Workflows
Creating an analysis with multiple steps
Now that you have created your own dataset, you can run an analysis or several analyses, which eventually becomes what is known as a workflow.
These are some of the things you can do with workflows:
a) Build your own
b) Import someone else’s
c) Edit it
d) Share it
Let’s build a very simple workflow that runs two tools.
Galaxy offers a variety of different trimming/filtering tools for NGS reads .
- Here, we will use the fastp tool, which is straightforward to configure, and when combined with the MultiQC tool, enables a nice and easy-to-interpret visualization of how preprocessing changes the quality of your reads for multiple samples.
1. Search for fastp in your toolshed.
After you find it, first scroll all the way to the bottom of this new information that popped up. Here you can read what you can do with the tool, how it works (input and output files), referencing and even tutorials about the tool.
2. Click the drop-down arrow under Single or Paired-end reads, and choose Paired Collection
- You will see that it automatically selects the dataset you created under the option for Select paired collection(s), because you only have one collection in your current History.
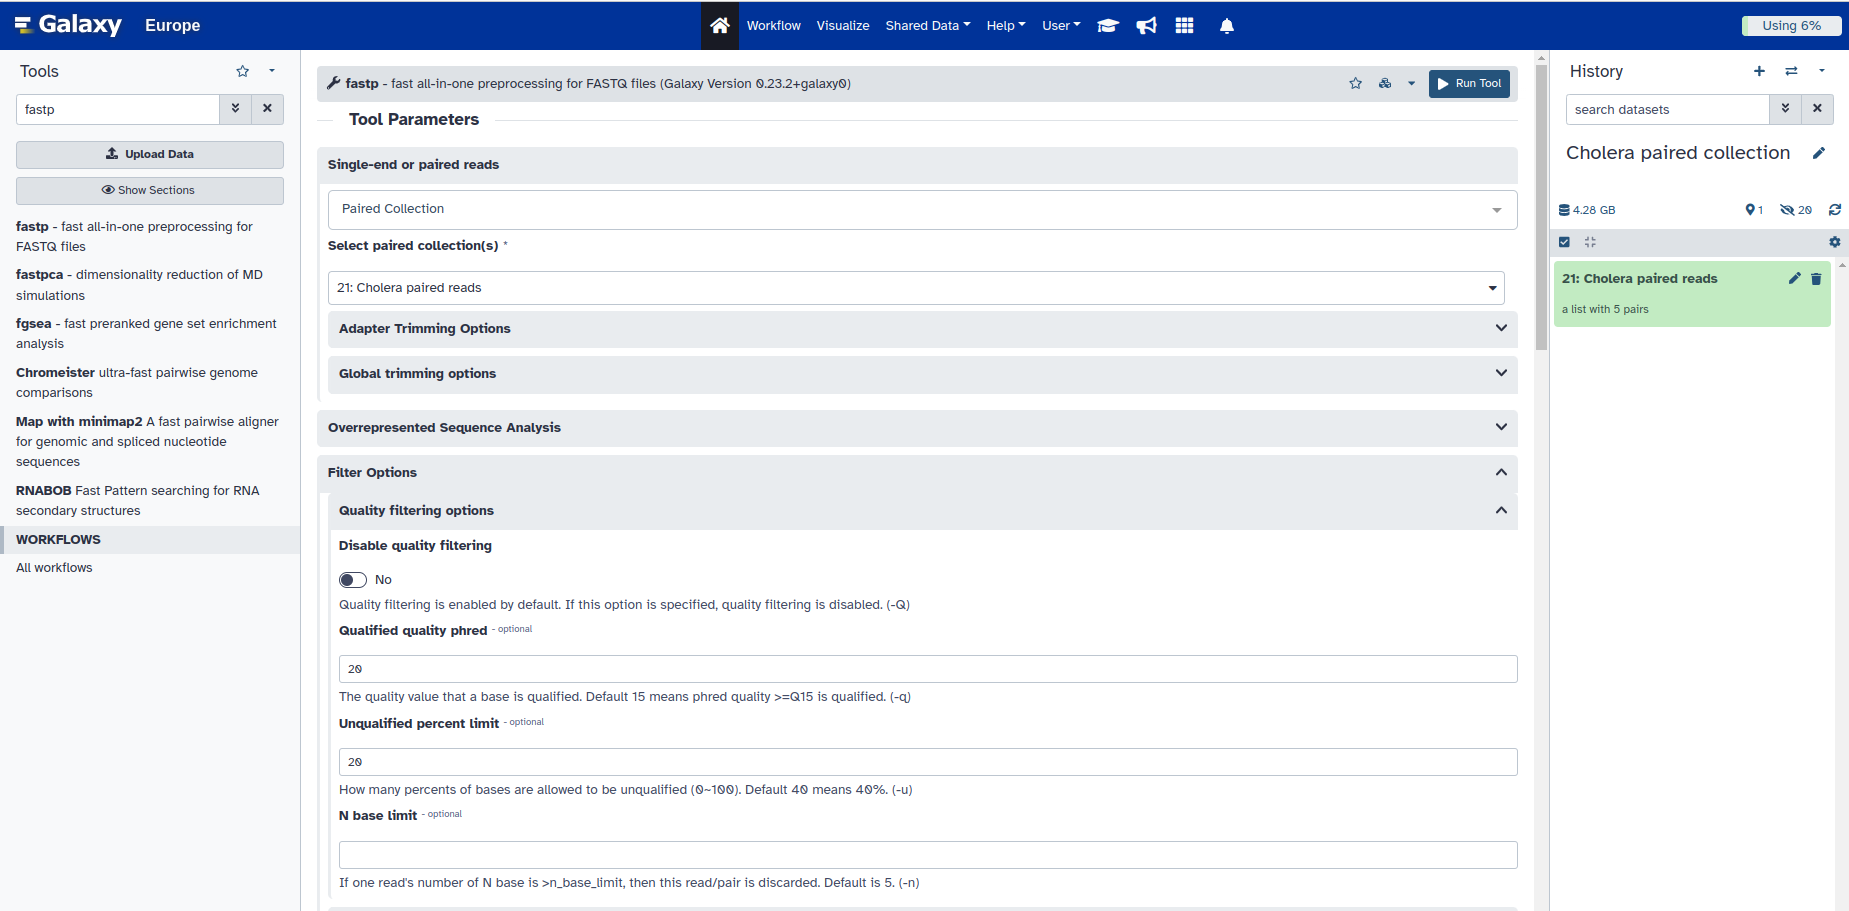
3. Fill out the parameters as shown below and click on Run Tool at the bottom of the page.
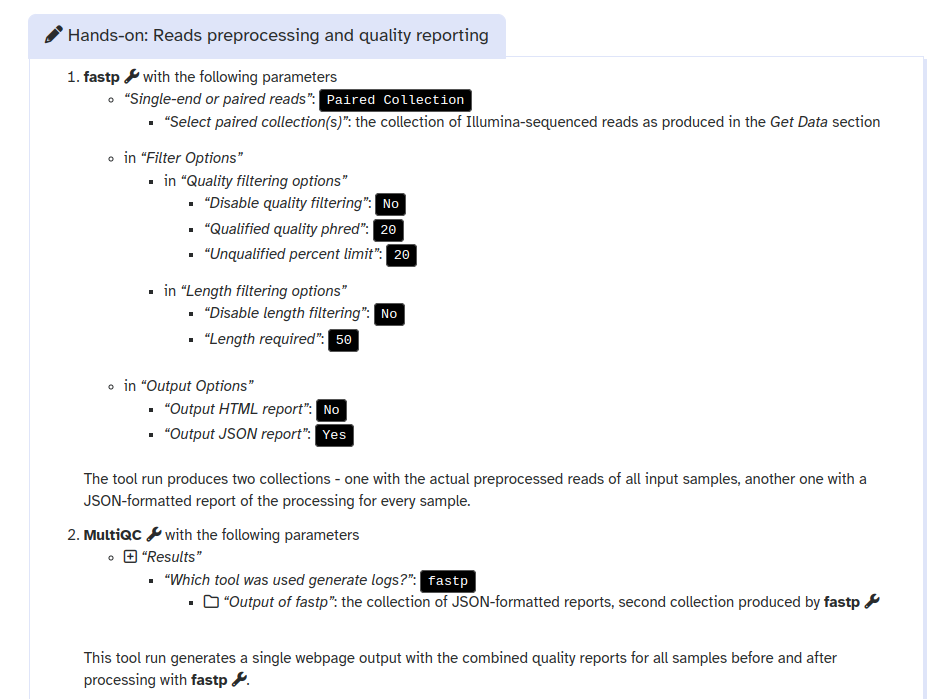
[!WARNING] When doing Bioinformatics, it is important to plan your workflow and to understand the input an output formats of each subsequent tool.
If you don’t have that many samples, or your plan on looking at each quality report from fastp individually, then you only really need to use the HTML report as output.
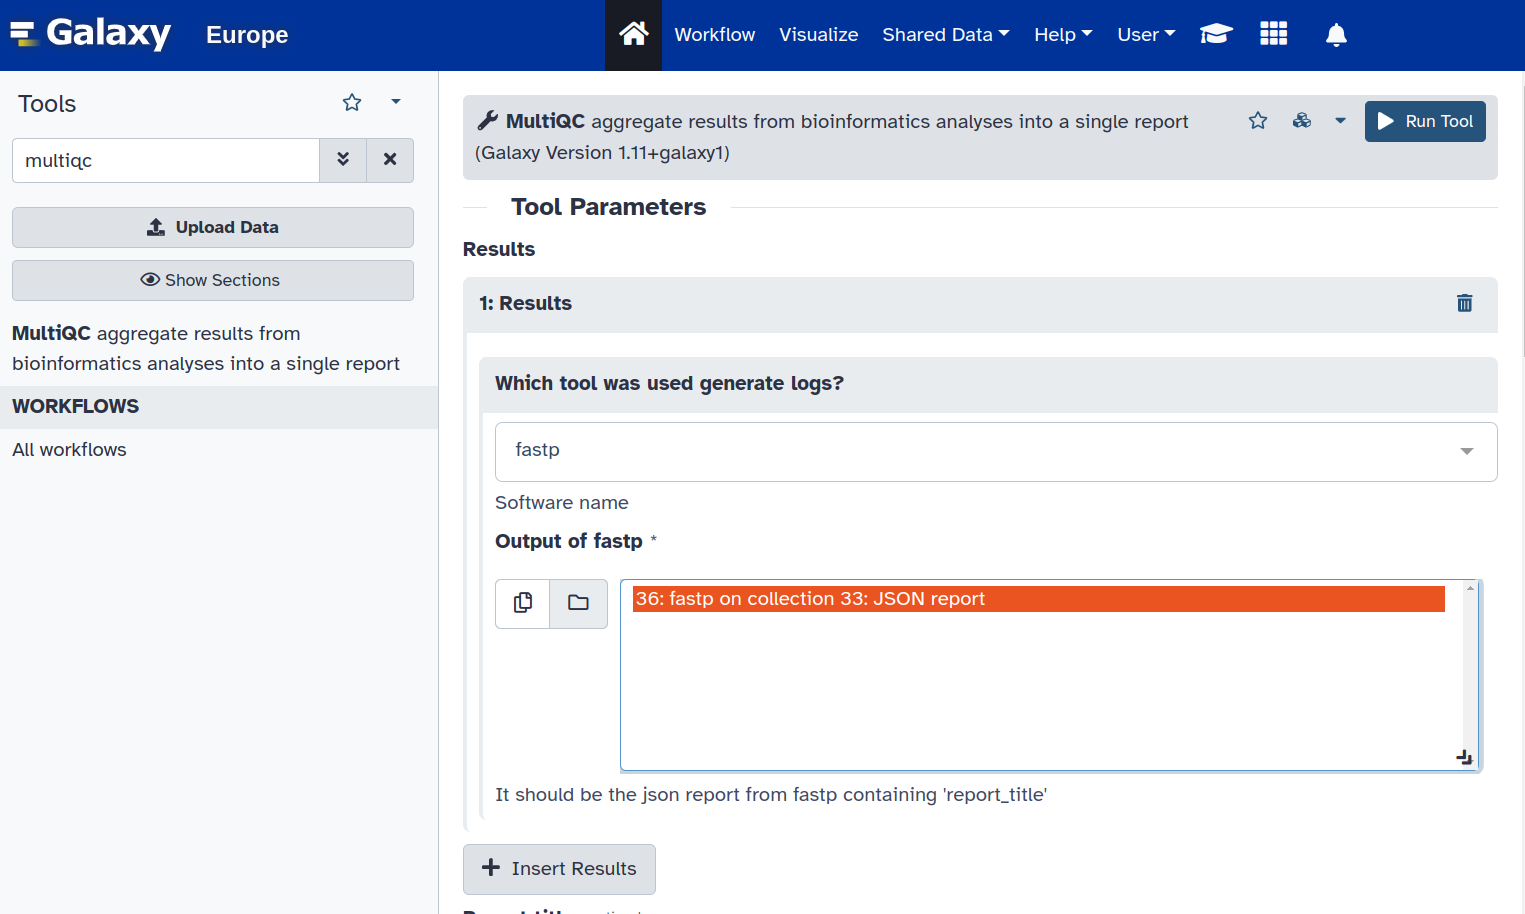
If we want to collate our reports to see a summary and do a comparison across samples, we need to use a tool such as MultiQC. However, MultiQC accepts a JSON file as input; which is why we also selected this format for output in the previous step.
4. Search for the MultiQC tool and select that you generated the files using fastp. Make sure you click on the JSON file, so that you get the option to run the tool.
Let’s analyze the output
 Questions:
1. What do you notice about the samples under the General statistics section?
2. Does anything stand out under the Filtered Reads section?
3. Is there a change in the N-content for the forward and reverse reads after cleaning it up with fastp?
4. What do you notice about GC content of samples?
5. What do you think this could mean?
6. What type of test can you do to validate the sample species?
[!TIP] In the case where you are not sure if your sample is contaminated, you can run a tool called Kraken2, which will compare your sequence to the sequences of other organisms in the database you select, and it will report back to you what (micro)organism/biological entity your sequence most likely is.
Kraken
[!CAUTION]
Kraken takes VERY LONG to run. So be prepared to do something else while you wait.

1. Search for Kraken2.
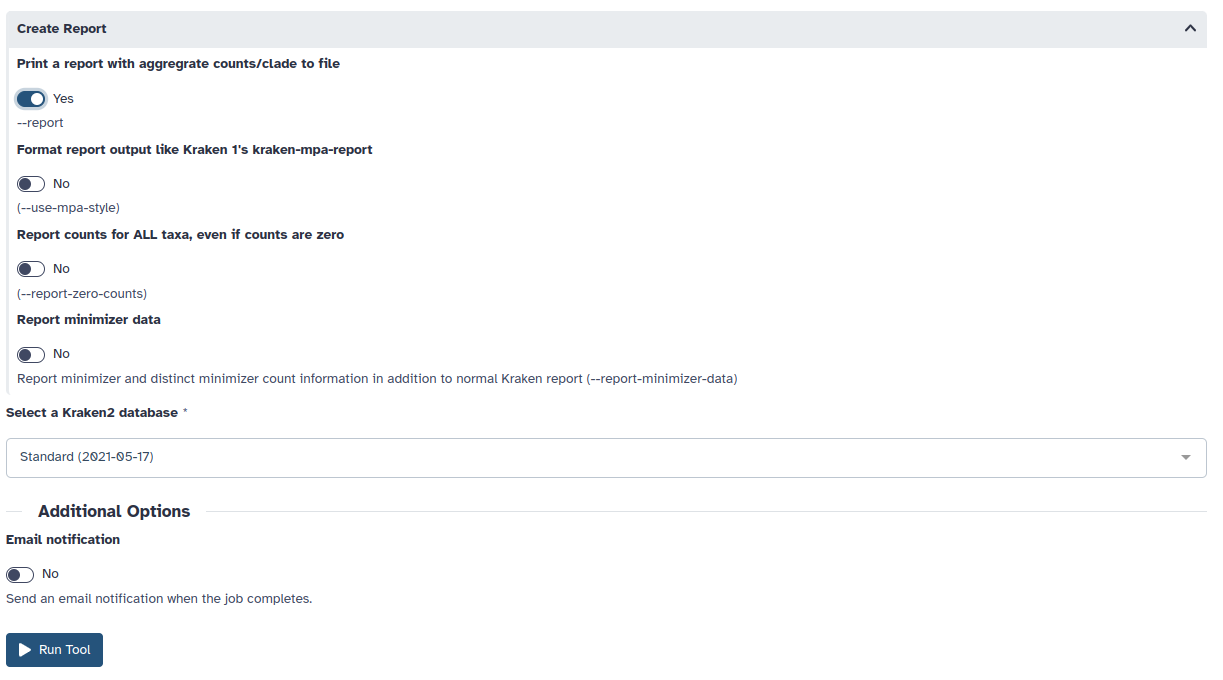
2. Select a single read (image below).
3. Select the read you want to interrogate (image below).
4. Select a Confidence of 0.1. (image below).
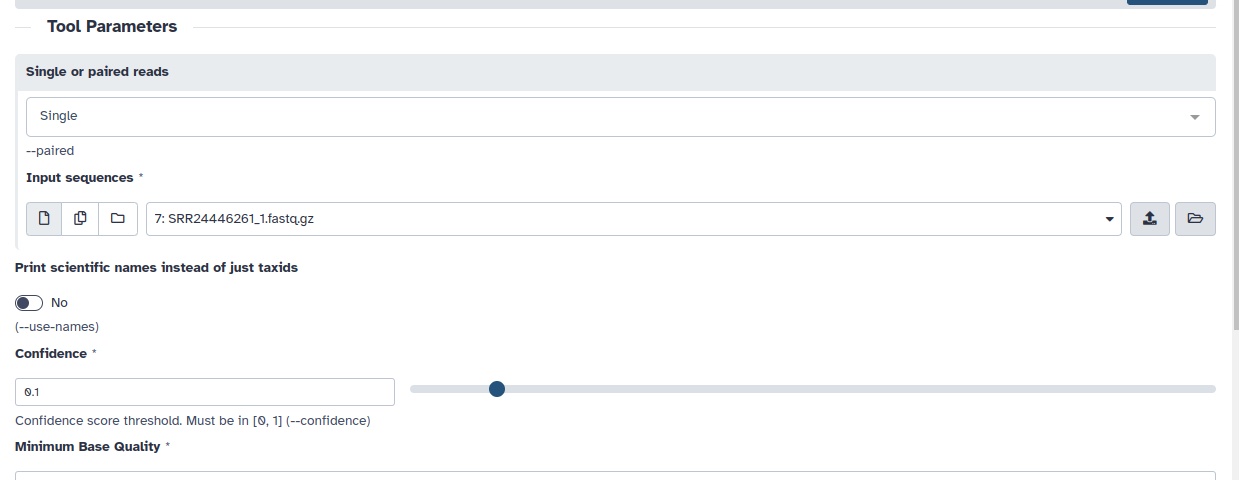
5. Choose “Yes” to Print a report with aggreagate counts/clades
6 Under Select a Kraken2 database, choose the most recent Standard (2021/05/17) database and Run the tool.
Creating your workflow
If this is a type of analyses that you usually have to do on your samples, and you don’t want to keep doing this analyses from scratch.
It is advisable to turn your analysis into a workflow.
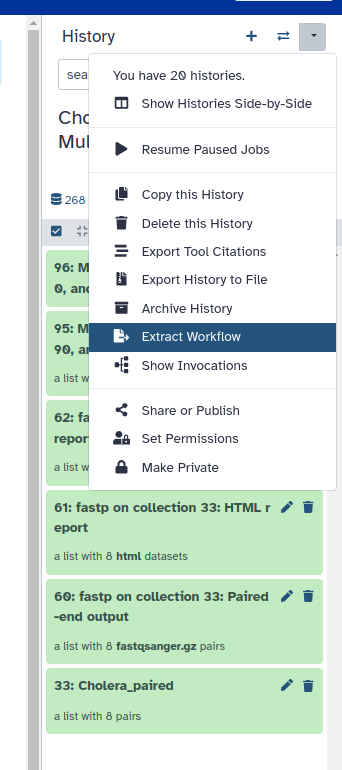
1. At the top right corner of your History, click on the drop-down arrow to expand the options, and select Extract Workflow.
2. Change the workflow name to something intuitive and click on Create Workflow.
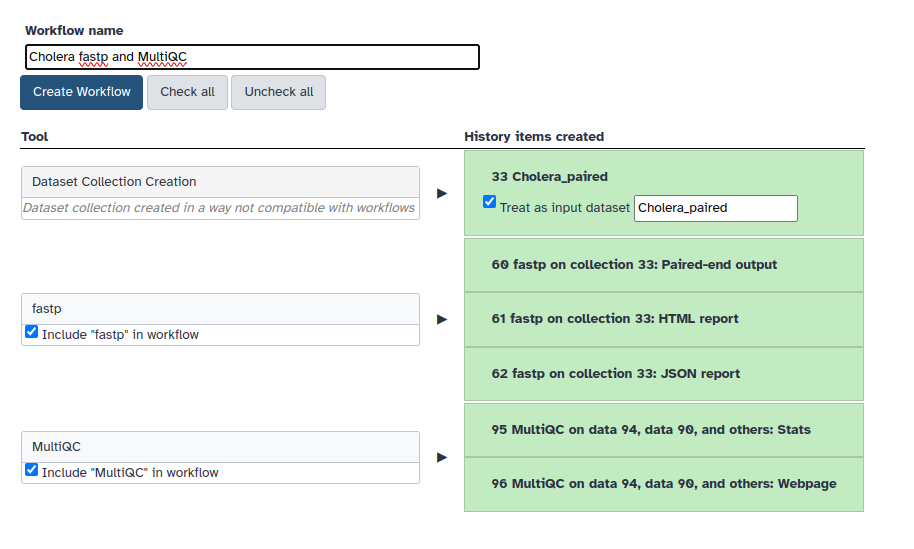
You will now be able to click on the Workflow tab all the way at the top and see your very own created workflow.
-
You can either click on the Run button at the far right. This will allow you to run it on any new samples you want to process in you new History.
-
Or you can click on the dropdown to the left of the workflow name to Edit, View, Share, Export, etc.
Edit a workflow
1. To make changes to an existing workflow, click on Edit

[!NOTE]
You can now delete any tools or inputs/outputs from tools.
You can also build upon an existing workflow.
2. Let’s search for snippy in the toolshed.
3. Click on the tool and it will add it to your workflow.
4. You can now connect the input for this file by dragging the arrow from the input data to where it should go on your snippy tool.
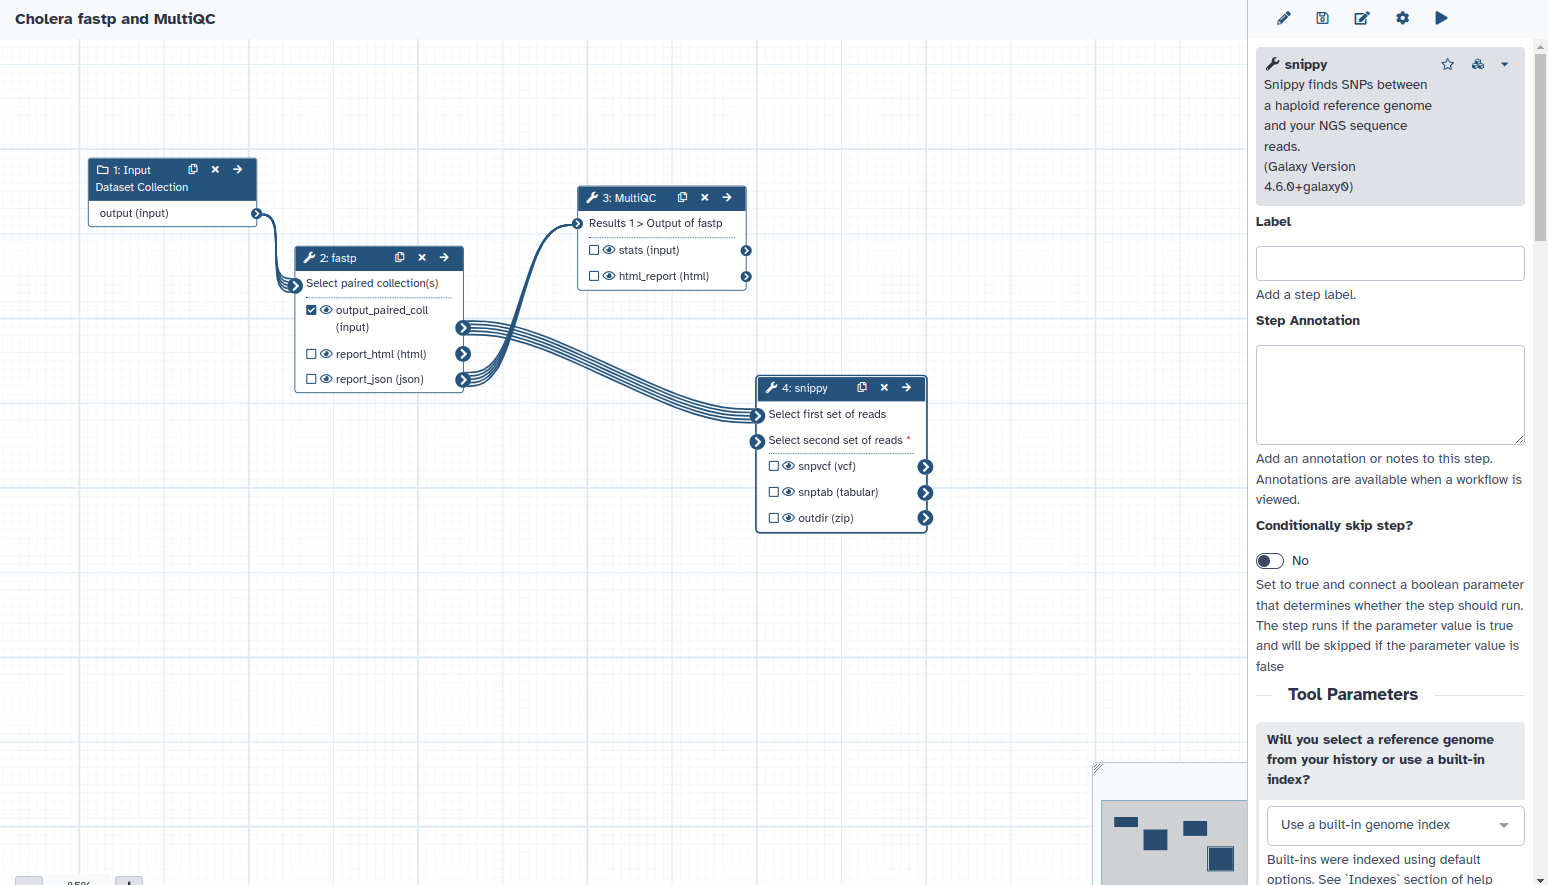
5. Click on a tool to change any parameters/variables. Here I clicked on snippy. So, on the right, I can choose how to modify how snippy will run on my samples.
6. Click the save icon at the top to save your edited workflow.
Share a workflow
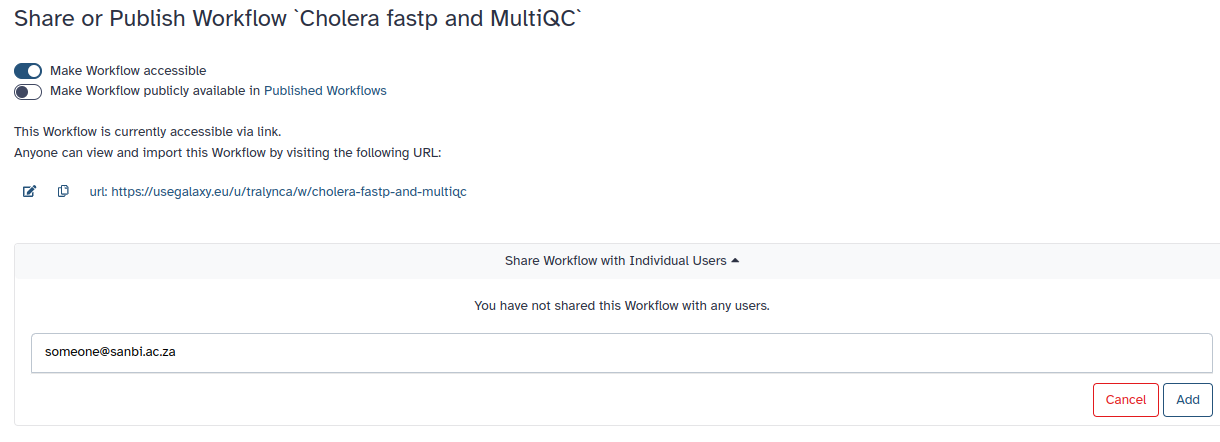
1. To Share your workflow, click on the drop-down arrow of the workflow you wish to share, and select Share.

2. If you click on Make workflow accessible, a second box appears.
Here you can either make it publicly available to anyone on Galaxy, or you can send the url of your workflow to your peers.
3. Similarly, you may also share your workflow with individuals via their email address.
Publicly available workflows
Anyone can publish a workflow on Galaxy.
1. To retrieve one of these workflows, click back on Workflows at the top if you’re not already there. Select Import at the top right.
2. Here you can choose to import a workflow using several different means. Let’s choose the middle tab, which says GA4GH servers
- Note that it is automatically on workflowhub.eu, but you may also import using the Dockstore if you click on the dropdown.

Unfortunately, no one has built one yet for cholera. Perhaps that will be one of you
3. Let’s search for SARS in the search bar. You will see many published workflows. Try to find one created by SANBI.

4. Click on the Version button and it will import the workflow. Even though this workflow may not be appropriate for cholera, this is also a way to save yourself time. You can always modify this one with tools and parameters for a a cholera analysis and rename it appropriately.